


CLASSROOM ORGANIZATION
Classroom Organization: Set Up for Large and Small Spaces
CLASSROOM ORGANIZATION
 Setting up a classroom can be a daunting task for most people. Figuring out how to arrange the room and getting around those annoying obstacles can be frustrating, especially if you are down-sizing! Classroom organization (or lack of) can impact classroom management and student learning. Fortunately for you, I've had to move my classroom many times and I've acquired some tips and techniques to share with you. My current building is under construction and some lucky teachers are moving their classrooms in the middle of the year...I'm one of them! I'll take you into my second grade classroom & then some smaller spaces.
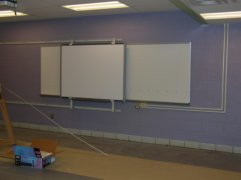
My colleague Allison is happy about her new divider that not only divides her space, but functions as a white board and bulletin board!
Room 15 Classroom Map
Every year, I create a classroom organization map before I actually begin moving furniture. There are many sites out there that allow you to enter the dimensions of your room. However, I've preferred to use a blank Power Point slide to create my layout. Go to "Insert," then "Picture," and finally, "Auto Shapes". You can easily manipulate your shapes to fit the furniture in your classroom!
CLASSROOM ORGANIZATION: ARRANGING YOUR ROOM
Wall Space
Planning for wall spaces must be based on the teaching that you are doing. Knowing where your instruction will take place and the amount of room needed for display is important. Once you have the map of your classroom (or large furniture) in place, it's always best to hang up posters, paper, and borders so that you don't have to maneuver around all of the other "stuff".
Some simple suggestions:
- Don't just decorate bulletin boards. Use them as instructional spaces.
- Use fadeless paper or fabric so that yon can reuse the bulletin boards without having to do them again.
- Maximize cabinet doors.
- If you have large bulletin boards and/or dry wall, use them for things that are most difficult to hang.
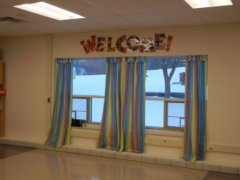
- Use windows to display posters.
- Use the space outside of your classroom to display student work.
- Try to place furniture appropriately so that it's not taking up too much wall space.
- Tri-fold poster boards can also serve as portable wall space!
|
|
|
|
|
|
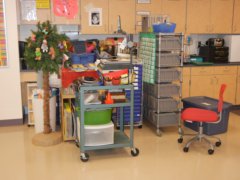
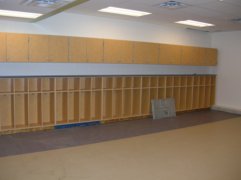
When you are arranging your room, it's best to get the little things out of the way, including the student desks! By keeping them out of the way, you can assess the perimeter of your room and use the space effectively.
|
|
|
|
|
|
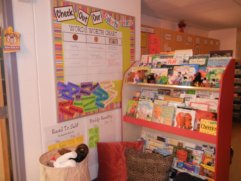
CLASSROOM ORGANIZATION: CREATING A WORD WALL
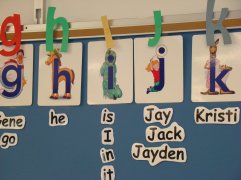
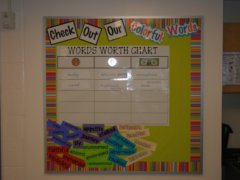
A word wall is an interactive collection of words to help young children learn about letters and sounds and ABC order. They are not just decorations, rather a work in progress to promote learning. You can find a plethora of variations from classroom to classroom.
Word Wall Suggestions:
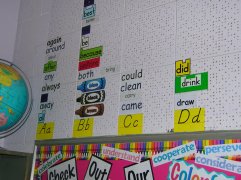
- Create low and interactive word walls for emergent readers and close to your whole group instruction area. Some teachers place their word walls on their magnetic boards so that children can manipulate the words.
- Cards with uppercase and lowercase letters written in black so that all students can see the words from various locations (if possible).
- Make the vowel cards stand out from the consonants.
- For emerging readers, provide a few examples of environmental print under some letters to help students learn letter names and sounds.
- For emerging readers, place the names (and pictures) of students under their beginning letter.
- Add words to your word wall as students are learning the words. Once words are on the wall, expect kids to spell them correctly.
- If you have limited wall space in your classroom, think about using a tri-fold board for your word wall. (Two of these boards placed together provide plenty of room words!)
|
|
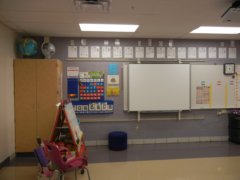
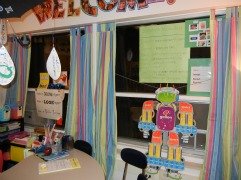
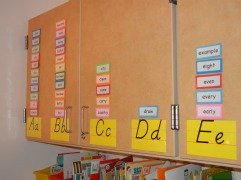
In my current classroom I have so much storage, but not a lot of wall space! I had to create my word wall on the cabinet doors using cards I made myself. I'd like my children to be able to manipulate the words, but that just wasn't possible in this classroom! I've placed a small stool under the word wall so that students can get a closer look, if needed.

|
|
Word Wall Flashlight Song
Using a flashlight, turn off all of the lights, sing the song, and shine the flashlight on a word. Have a child say the sounds in that word and put them together to "read" the word. Repeat this song and shine on another word to be read!
I will be updating the Classroom Organization Page frequently with my word walls and other word walls I find interesting!
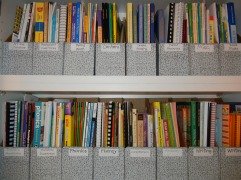
CLASSROOM ORGANIZATION: CLASSROOM LIBRARY
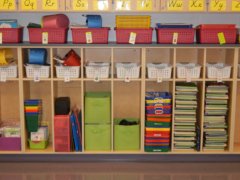
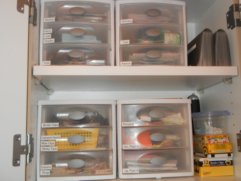
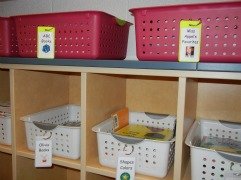
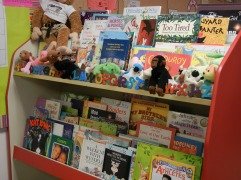 Getting your classroom library set up can be one of the most difficult things to organize in your room! When I first started a few years ago, I had a couple of my former students come in. We laid out all of the books and began to create piles of books by authors, illustrators, and topics. (Because teaching my students how to select appropriate text is very important to me, I didn't want to level my books with a letter or number). I was able to create 19 different bins at the time. I invested in some sturdy bins and ended up purchasing more than I needed because I knew my library would continue to grow. All of the remaining books were kept on the red book shelf (pictured on the left). I try to keep 3-4 empty book bins in my classroom so that children can even create more labeled bins for me...They are really good at coming up with new groups for me!
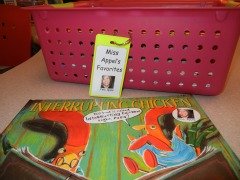
Once I established the names for each bin, I created a picture to represent that bin. These were mostly found by googling and using clip art from Word. I also invested in luggage tags from Container Store. Although they weren't cheap, they are very durable and can withstand my little kiddos. Each book that is in the bin has a corresponding picture that is on the outside.
|
|


